
Embarking on a journey is not just about reaching a destination; it’s about the experience woven into every mile. Yet, amidst the pleasure of a smooth drive, the spaces between car seats often harbor an untold story of neglect. This guide unfolds the narrative of these overlooked nooks, revealing the pivotal role they play in shaping the cleanliness, hygiene, and overall allure of your cherished vehicle.
As we delve into the nuanced art of cleaning between car seats, discover how each meticulous step contributes to crafting an interior that transcends mere cleanliness—a haven of comfort, pride, and driving delight.
First, we will cover basic cleaning techniques and then move on to deep cleaning.
How to Clean Between Car Seats? Basic Cleaning Guide
Step 1: Gathering the Basic Tools for Cleaning Between Car Seats
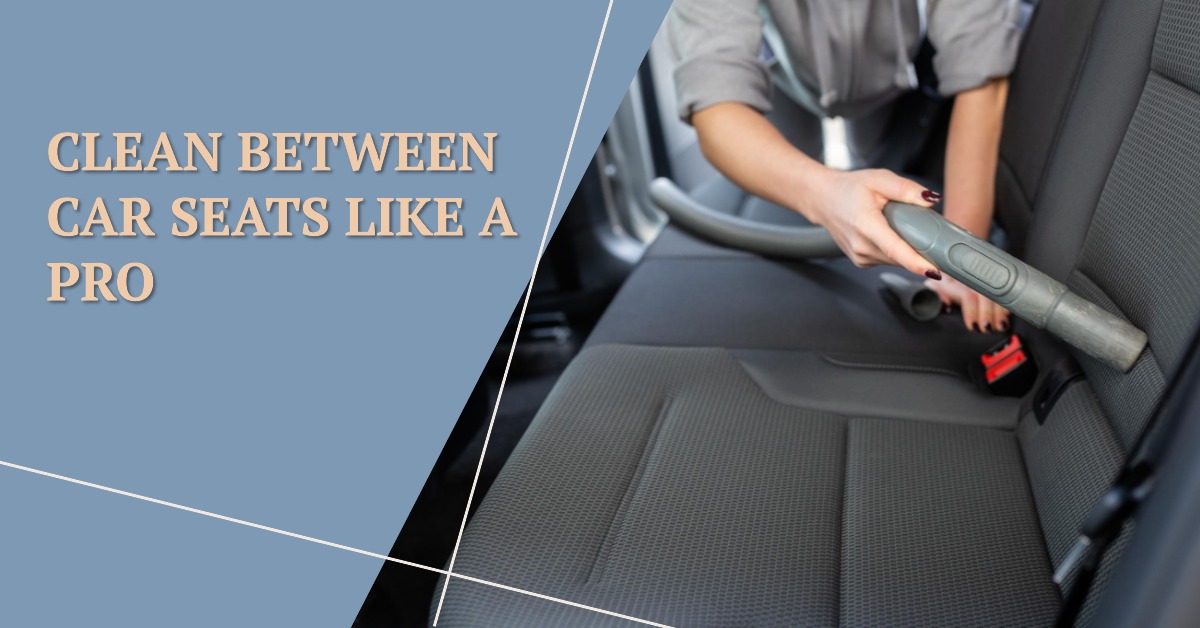
a. Vacuum Cleaners: Investing in a vacuum cleaner with specialized attachments is a game-changer for between-seat cleaning. Crevice tools and narrow nozzles enable you to delve into the tight spaces where dirt, crumbs, and debris accumulate. A powerful vacuum ensures effective suction, leaving no room for stubborn particles to linger.
b. Brushes and Crevice Tools: Detailing brushes and crevice tools are your allies in the battle against hidden dirt. Choosing the right brush is crucial – a soft brush or an old toothbrush works well to dislodge stubborn particles without causing damage to the upholstery. Crevice tools, designed to navigate confined spaces, play a crucial role in reaching those elusive nooks and crannies.
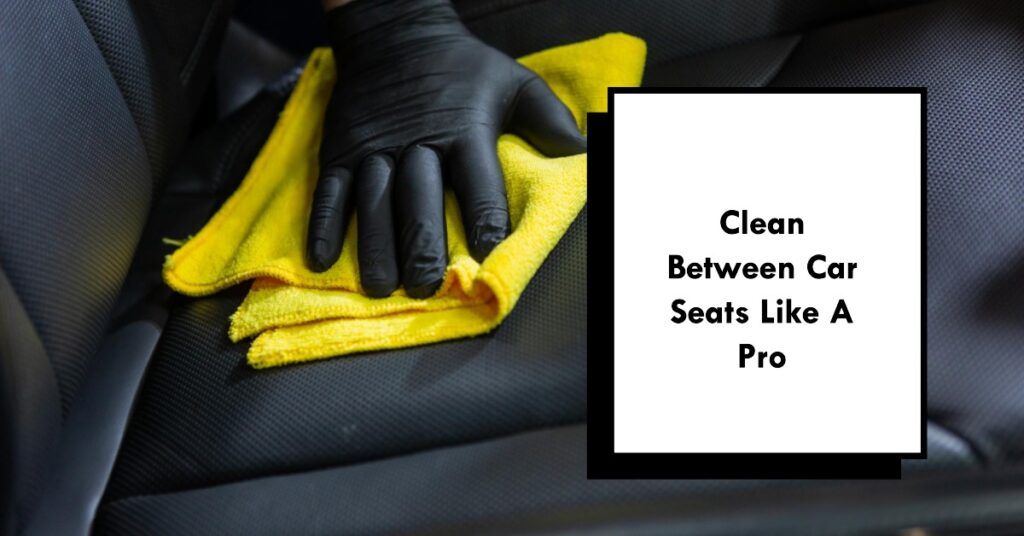
c. Microfiber Cloths: Microfiber cloths are the unsung heroes of between-seat cleaning. Their fine fibers excel at capturing dirt and dust, providing a meticulous finish in the narrow spaces between car seats. Dampen these cloths slightly for effective wiping, ensuring a thorough cleanup.
Step 2: Basic Cleaning Steps
Taking a step-by-step approach to cleaning between car seats is essential for achieving a thorough and effective result. This section will guide you through the fundamental cleaning steps, ensuring that you leave no dirt or debris behind.
a. Removing Loose Debris
1. Using a Vacuum for Initial Debris Removal: Begin the cleaning process by arming yourself with a reliable vacuum cleaner equipped with crevice tools. The narrow nozzles and specialized attachments are designed to reach the tight spaces between car seats where loose debris tends to accumulate. Ensure the vacuum is set to its highest suction setting for optimal effectiveness.
2. The Importance of Starting with a Clean Surface: Starting with a clean surface is not just a convenience; it’s a strategic move. By using the vacuum to remove loose debris initially, you create a foundation for the subsequent steps. This prevents loose particles from hindering the effectiveness of the brushing and wiping processes that follow.
b. Brushing and Wiping
1. Choosing the Right Brushes for Between-Seat Cleaning: When it comes to brushing between car seats, the choice of brushes is crucial. Opt for soft brushes or old toothbrushes to dislodge stubborn dirt without causing damage to the upholstery. The goal is to lift surface dirt and particles embedded in crevices effectively. Take extra care when dealing with different materials – softer brushes for cloth seats and gentler approaches for leather.
2. Wiping Down Surfaces with a Damp Microfiber Cloth: After brushing, it’s time to wipe down the surfaces. Employ a damp microfiber cloth for this task. Microfiber’s fine fibers capture dirt and dust, providing a meticulous finish. Dampening the cloth slightly enhances its cleaning power. Ensure the cloth is not excessively wet to prevent introducing excess moisture between seats.
c. Vacuuming Again
1. Ensuring Thorough Removal of Dislodged Dirt: The brushing and wiping process will dislodge dirt and particles, but to ensure a comprehensive clean, a second round of Vacuuming is essential. Use the vacuum’s crevice tools and attachments to target specific areas. Pay close attention to corners, seams, and any other spots where debris may hide. This step guarantees that no particles are left behind.
2. Final Pass with the Vacuum for a Clean Finish: The final pass with the vacuum is like the finishing touch to a masterpiece. It ensures that every nook and cranny between car seats is free of dirt. Adjust the suction settings if necessary, and methodically go over the entire area. This meticulous approach guarantees a clean finish, leaving your car interior looking and feeling refreshed.
More Profound Cleaning Techniques: A Step-by-Step Guide
A. Cleaning with Cleaning Solutions
1. DIY Cleaning Solutions for Between Seats
When it comes to deep cleaning between car seats, DIY solutions are not only cost-effective but also provide the satisfaction of using household items to tackle stubborn dirt. Here’s a step-by-step guide to creating your DIY cleaning solution:
Materials:
- Warm water
- Mild detergent or dish soap
- Soft-bristle brush or an old toothbrush
- Clean microfiber cloth
Steps:
Step 1: Gather Your Materials Assemble warm water, a mild detergent or dish soap, a soft-bristle brush or an old toothbrush, and a clean microfiber cloth.
Step 2: Mix the Solution. In a container, combine warm water with a small amount of mild detergent or dish soap. Mix thoroughly until you create a soapy solution.
Step 3: Test on a Small Area Before applying the solution to a larger area, test it on a small, inconspicuous spot to ensure compatibility with your car’s upholstery.
Step 4: Apply the Solution Dip the soft-bristle brush or toothbrush into the soapy solution. Gently scrub the areas between car seats, focusing on spots with visible dirt or stains.
Step 5: Wipe Down with Microfiber Cloth After scrubbing, use a clean microfiber cloth to wipe down the surfaces. This helps remove loosened dirt and ensures a clean finish.
Step 6: Dry Thoroughly. Allow the cleaned area to air-dry completely before placing any items back between the car seats. This step prevents the accumulation of excess moisture.
2. Commercial Products Suitable for Tight Spaces
Commercial cleaning products designed for tight spaces offer convenience and efficiency. Here’s a step-by-step guide to using these products effectively:
Materials:
- Commercial cleaning product for car interiors
- Microfiber cloth or applicator pad
Steps:
Step 1: Choose the Right Product. Select a commercial cleaning product specifically formulated for car interiors. Look for products that mention effectiveness in tight spaces or between car seats.
Step 2: Read and Follow Instructions Carefully read the product instructions for application and safety guidelines. Adhering to the recommended usage ensures optimal results and prevents damage to your car’s upholstery.
Step 3: Test on a Small Area Before applying the product to a larger area, test it on a small, inconspicuous spot to ensure compatibility and avoid any adverse reactions with your car’s interior materials.
Step 4: Apply the Product Following the product instructions, apply it to the areas between car seats using a microfiber cloth or an applicator pad. Pay extra attention to spots with visible dirt or stains.
Step 5: Wipe and Buff. Use a clean microfiber cloth to wipe and buff the treated surfaces. This step not only removes dirt but also leaves a polished finish.
Step 6: Allow Drying Time: Allow the treated areas to dry completely. This may involve waiting for a specified time mentioned in the product instructions. Proper drying prevents residue buildup and ensures a clean and refreshed interior.
B. Steam Cleaning
1. Using Steam Cleaners for a Deeper Clean
Steam cleaners are highly effective for deep cleaning between car seats, utilizing hot steam to lift dirt and sanitize surfaces. Here’s a step-by-step guide to using a steam cleaner:
Materials:
- Steam cleaner designed for automotive use
- Clean microfiber cloth
Steps:
Step 1: Choose a Suitable Steam Cleaner. Select a steam cleaner designed specifically for automotive use. Ensure it comes with attachments suitable for reaching between car seats.
Step 2: Prepare the Steam Cleaner. Follow the manufacturer’s instructions to fill the steam cleaner with water and allow it to heat up. Ensure it reaches the recommended temperature for effective cleaning.
Step 3: Test on a Small Area Before tackling the entire space between car seats, test the steam cleaner on a small, inconspicuous area to check for compatibility with your car’s upholstery.
Step 4: Steam Clean Between Seats Use the steam cleaner’s nozzle or attachment to apply steam between the car seats. Work systematically, covering the entire area and paying extra attention to spots with visible dirt or stains.
Step 5: Wipe Away Dirt As the steam lifts the dirt, use a clean microfiber cloth to wipe away the loosened particles. This step ensures that the earth is effectively removed from the surfaces.
2. Precautions and Considerations When Using Steam
Safety First: Always follow safety guidelines provided by the steam cleaner manufacturer. This includes wearing appropriate protective gear and ensuring proper ventilation in the cleaning area.
Avoid Excessive Moisture: While steam cleaning is effective, avoid excessive moisture in the car interior. Use the steam cleaner judiciously, and ensure thorough drying after cleaning to prevent mold and mildew.
Mindful of Material Sensitivity: Be aware of the materials in your car’s interior. Steam is generally safe for most fabrics, but sensitive materials like leather may require extra care. Test on a small area first and avoid prolonged exposure.
Ventilation is Key: Ensure good ventilation while using a steam cleaner. This prevents the buildup of moisture and helps in the quick drying of cleaned surfaces.
Seat-Specific Cleaning Tips: How to Clean?
A. Cloth Seats
1. Tailoring Cleaning Techniques for Fabric Upholstery: Cleaning cloth seats requires a tailored approach to ensure the effective removal of dirt and stains without compromising the fabric. Begin by vacuuming the surface to eliminate loose debris. For stubborn particles, use a soft brush or an old toothbrush. The goal is to dislodge dirt without causing damage.
Pro Tip: Consider using a handheld bristle brush with soft bristles for an added layer of gentleness. Brush in the direction of the fabric weave to avoid snagging.
Next, prepare a DIY cleaning solution by mixing a tablespoon of dish soap with a cup of water. Dampen a lint-free microfiber cloth with the solution and gently blot stains. Avoid oversaturating the fabric to prevent water damage. For a finishing touch, use a dry microfiber cloth to absorb any remaining moisture.
2. Addressing Crevices in Cloth Seats: Crevices in cloth seats are notorious hiding spots for dirt and crumbs. To tackle these areas effectively, utilize crevice tools that accompany your vacuum cleaner. Ensure the attachment can navigate the narrow spaces between seats and around seat tracks.
Pro Tip: If your vacuum cleaner doesn’t have a crevice tool, a compressed air canister or a handheld vacuum with crevice attachments can be invaluable.
After vacuuming, inspect crevices for persistent dirt. For tight spots, wrap a cloth around the end of a detailing brush and gently insert it into the gap, rotating to capture hidden particles. Always work patiently to avoid pushing dirt further into the seat.
B. Leather Seats
1. Special Considerations for Cleaning Between Leather Seats: Cleaning between leather seats requires a delicate touch to preserve the material’s quality and appearance. Start by vacuuming the area with a soft brush attachment to remove loose dirt. Unlike cloth seats, avoid using a stiff bristle brush, as it may scratch the leather surface.
Pro Tip: Check your vehicle’s manual for any specific recommendations or restrictions on cleaning products for leather upholstery.
When preparing a cleaning solution, opt for a quality leather cleaner that is pH-balanced and specifically designed for automotive use. Apply the cleaner to a soft cloth, ensuring it’s not overly damp, and gently wipe down the leather between seats. Pay special attention to seams and stitching where dirt tends to accumulate.
2. Avoiding Damage to Leather Surfaces: Leather is susceptible to damage from harsh chemicals and excessive moisture. When cleaning between leather seats, refrain from using products containing bleach, ammonia, or other abrasive substances. These can strip away the natural oils in the leather, leading to dryness and cracking.
Pro Tip: For a natural alternative, mix equal parts white vinegar and water. Dampen a cloth with the solution for gentle cleaning.
Avoid leaving excess moisture on leather surfaces. After cleaning, use a dry, absorbent microfiber cloth to remove any remaining moisture. If your vehicle is equipped with heated seats, turn them on briefly to expedite the drying process. You can check out some leather car seat cleaners for optimum results.
By adopting these seat-specific tips, you ensure that both cloth and leather seats receive the care they deserve. Tailoring your cleaning techniques to the specific needs of each material not only enhances cleanliness but also prolongs the life and aesthetic appeal of your car’s interior.
Troubleshooting for Unwanted Challenges
A. Dealing with Stubborn Dirt
1. Strategies for Tackling Persistent Debris: Stubborn dirt between car seats can be challenging, but with the right strategies, you can conquer even the most tenacious particles. Consider upgrading to a vacuum cleaner with higher suction power or using a specialized vacuum attachment designed for stubborn debris. Additionally, introducing a detailing brush with stiff bristles can prove effective in dislodging persistent dirt.
Pro Tip: Prioritize a methodical approach, starting from the edges of the dirt and working your way toward the center to avoid spreading particles.
2. Adjusting Cleaning Methods for Challenging Spots: Adapting your cleaning methods to the specific challenges presented by certain spots is critical. If dirt is embedded in crevices, use a crevice attachment with your vacuum cleaner or a compressed air canister to dislodge particles. For textured surfaces, a soft-bristle brush, when used gently, can help remove dirt without causing damage.
Pro Tip: When faced with challenging spots, experiment with different tools and techniques, adjusting your approach based on the type of dirt and the surface you’re working on.
B. Excess Moisture
1. Drying Techniques to Prevent Mold and Mildew: Excess moisture left after cleaning can lead to mold and mildew growth, compromising both cleanliness and air quality. After cleaning, leave the car doors open to promote air circulation. If possible, park the car in a sunny spot to harness the natural drying power of sunlight.
Pro Tip: Use a portable fan to expedite the drying process, especially in areas with limited ventilation.
2. Using Absorbent Materials in Damp Areas: To address damp areas effectively, employ absorbent materials. Place absorbent towels or paper towels in the wet spots between seats to soak up residual moisture. Check these materials periodically and replace them as needed until the area is arid.
Pro Tip: Silica gel packs, often found in packaging, can also be placed in damp areas to absorb moisture efficiently.
Child-Friendly Cleaning Tips
A. Considering Child Seats
1. Special Attention to Areas Around Baby and Booster Seats: Areas around baby and booster seats require meticulous attention. Use a handheld vacuum with crevice attachments to reach into the spaces beneath and around the child’s seat. Regularly remove and clean the seat cover according to the manufacturer’s guidelines to prevent the accumulation of crumbs and spills.
Pro Tip: Consider using seat protectors under child seats to catch spills and crumbs, making cleanup more manageable.
2. Using Safe Cleaning Products for Child-Related Messes: When dealing with child-related messes, prioritize the use of safe and non-toxic cleaning products. Opt for mild, fragrance-free solutions to avoid any adverse reactions. Always check product labels for child-safety information and adhere to recommended usage guidelines.
Pro Tip: Baby wipes, known for their gentle cleaning properties, can be handy for quick cleanups of spills and stains. Check out our blog post on how to clean a baby car seat for more ideas.
Maintenance Tips
A. Regular Cleaning Schedule
1. Establishing a Routine for Between-Seat Cleaning: Consistency is vital to effective maintenance. Establish a regular cleaning schedule based on your usage patterns. Frequent Vacuuming, at least once a week, prevents the buildup of dirt and makes deep cleaning more manageable.
Pro Tip: Consider integrating between-seat cleaning into your overall car care routine, such as during regular interior detailing sessions.
2. Preventing Buildup for Easier Maintenance: Preventive measures significantly contribute to easier maintenance. Use seat covers to protect upholstery, especially in high-use areas. Encourage passengers to dispose of trash properly, minimizing the likelihood of spills and crumbs accumulating between seats.
Pro Tip: Keep a small trash receptacle in the car to discourage littering, making it easier for passengers to dispose of small items.
Final Words
In summary, mastering the art of cleaning between car seats involves tailoring your approach to the specific materials, troubleshooting challenges, ensuring child-friendly cleanliness, and establishing a maintenance routine.
Remember, a clean car interior not only enhances aesthetics but also contributes to a more enjoyable and comfortable driving experience. By following these step-by-step guidelines, you’re not just maintaining cleanliness; you’re fostering a space that reflects your care for both your vehicle and the well-being of those who ride in it. Regular attention to between-seat cleaning will undoubtedly pay off in the long run, ensuring a pristine and inviting car interior every time you hit the road.
As you master the intricacies of cleaning between car seats, don’t forget to explore our comprehensive guide on ‘how to clean car seats.’ Understanding both the broader picture and the nuances between seats ensures your entire car interior remains a testament to meticulous care, promising not just cleanliness but an enduring sense of pride and comfort. Dive into the details of each guide, and elevate your car care routine for a driving experience that’s truly exceptional.”