

Are you looking to remove the old, peeling tint from your car windows? Whether you want to update the look of your vehicle, improve visibility, or address tinting regulations, removing car tint can be a necessary task. However, it can also be challenging and time-consuming if not approached correctly.
Here I’ll provide you with valuable insights and step-by-step instructions on how to remove car tint effectively. We will cover a range of methods, from DIY techniques using everyday household items to professional assistance, ensuring you have all the information you need to tackle this task.
I understand the importance of maintaining a clean and well-maintained vehicle. Over the years, I have encountered various tint removal challenges and experimented with different approaches. Through my experiences, I have learned valuable tips and techniques to share with you in this guide.
By the end, you’ll have the knowledge and confidence to safely remove car tint and restore the clarity of your windows. So let’s dive in and learn how to remove car tint like a pro!
What is Car Tint?
Car tint, also known as window film, is a thin, multi-layered material applied to the interior or exterior of car windows. It serves various purposes, such as reducing heat and glare, protecting the interior from harmful UV rays, and providing privacy. However, car tint can deteriorate, develop bubbles, or become scratched over time, requiring removal and replacement.
Why Remove Car Tint?
There are several reasons why you may need to remove car tint. First, the tint may have faded or been damaged, compromising its effectiveness and appearance.
You may have purchased a new vehicle with a tint that doesn’t meet your preferences or local regulations. Whatever the reason, removing car tint can help you achieve a fresh start and ensure optimal visibility and aesthetics.
Necessary Tools and Materials
You’ll need a few essential tools and materials to remove car tint successfully. Here’s a list of items you should gather before starting the tint removal process:
- Heat gun or hairdryer
- Razor blade or utility knife
- Ammonia-based cleaning solution
- Spray bottle
- Paper towels or lint-free cloth
- Plastic scraper
- Fine-grit sandpaper
- Glass cleaner
- Microfiber cloth
- Plastic garbage bags or black trash bags
- Masking tape
- Safety goggles and gloves
How Can You Remove Car Tint? Simple and Easy Methods
Method 1: Using Steam for Car Tint Removal
Removing car tint using steam is a popular and effective method that softens the adhesive, making it easier to peel off the tint. Follow these steps for successful car tint removal using steam:
Step 1: Preparing the Work Area
Park your car in a well-ventilated area with access to power outlets.
Gather the necessary tools and materials, including a handheld steamer, plastic scraper or razor blade, cleaning solution, microfiber cloth, and masking tape.
Step 2: Applying Steam to the Tint
Fill the handheld steamer with water and let it heat up according to the manufacturer’s instructions.
Hold the steamer approximately 2-3 inches from the tinted window and apply steam sweepingly.
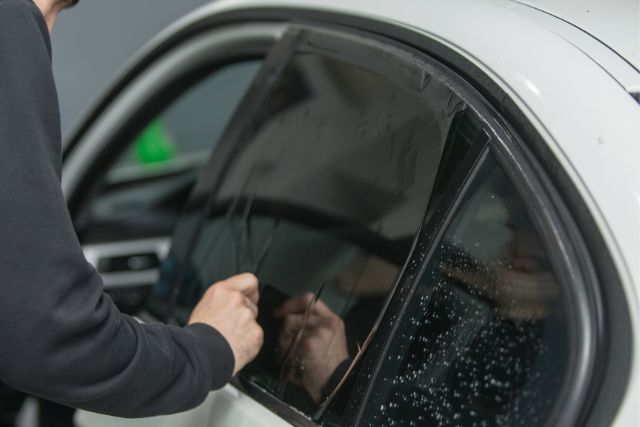
Step 3: Peeling Off the Tint
Once the adhesive softens, use a plastic scraper or razor blade to lift one corner of the tint.
Gently peel off the tint, not applying excessive force that could damage the window.
Step 4: Removing Residual Adhesive
If residual adhesive is left on the window, dampen a microfiber cloth with a cleaning solution and gently rub the adhesive until it comes off.
Repeat this process for all the windows until the adhesive is completely removed.
Step 5: Cleaning the Windows
After removing the tint and adhesive, clean the windows using a glass cleaner and a microfiber cloth to remove any remaining residue and ensure a clear finish.
Make sure to follow all safety precautions and take your time to achieve the best results.
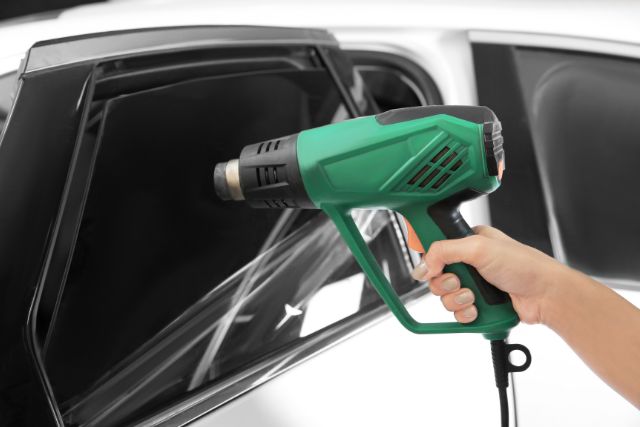
Method 2: Using Heat Gun for Car Tint Removal
Using a heat gun is another method to remove car tint by heating the adhesive and making it easier to peel off. Here’s how you can use a heat gun for car tint removal:
Step 1: Preparing the Work Area
Park your car in a well-ventilated area with access to power outlets.
Gather the necessary tools and materials, including a heat gun, plastic scraper or razor blade, cleaning solution, microfiber cloth, and masking tape.
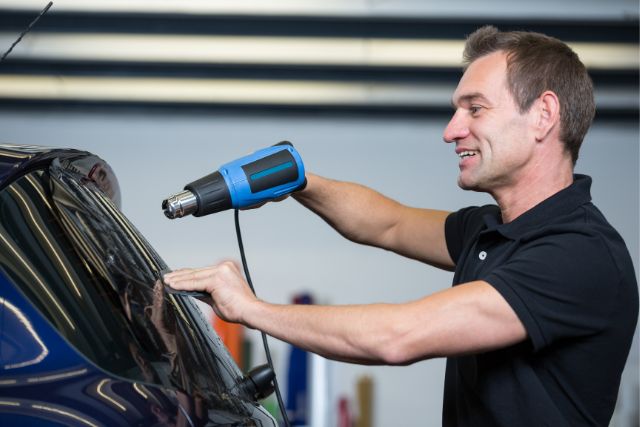
Step 2: Heating the Tint
Plug in the heat gun to a low to medium heat setting.
Hold the heat gun approximately 6-8 inches from the tinted window and start moving it back and forth, heating the tint evenly.
Step 3: Peeling Off the Tint
Once the adhesive softens, use a plastic scraper or razor blade to lift one corner of the tint.
Slowly and carefully peel off the tint, applying gentle pressure to avoid damaging the window.
Step 4: Removing Residual Adhesive
If residual adhesive is left on the window, dampen a microfiber cloth with a cleaning solution and gently rub the adhesive until it comes off.
Repeat this process for all the windows until the adhesive is completely removed.
Step 5: Cleaning the Windows
After removing the tint and adhesive, clean the windows using a glass cleaner and a microfiber cloth to ensure a streak-free finish.
Using a heat gun for car tint removal requires caution to prevent overheating the tint or damaging the window.
Method 3: Using Adhesive Remover for Car Tint Removal
Adhesive removers are specially formulated products that dissolve the adhesive used in car tint. Here’s how you can use an adhesive remover for car tint removal:

Step 1: Preparing the Work Area
Park your car in a well-ventilated area.
Gather the necessary tools and materials, including an adhesive remover, plastic scraper or razor blade, cleaning solution, microfiber cloth, and masking tape.
Step 2: Applying the Adhesive Remover
Read the instructions on the adhesive remover product and follow them carefully.
Apply the adhesive remover to the tinted window, ensuring complete coverage of the adhesive.
Step 3: Removing the Tint and Adhesive
Let the adhesive remover sit on the tint for the recommended time specified in the product instructions.
Use a plastic scraper or razor blade to gently peel off the tint, starting from one corner and working your way across the window.
You’ll notice that the adhesive comes off as you remove the tint.
Step 4: Cleaning the Windows
After removing the tint and adhesive, clean the windows using a glass cleaner and a microfiber cloth to ensure a precise, streak-free finish.
An adhesive remover for car tint removal can be an effective solution, but choosing a high-quality product and following the instructions carefully for the best results is essential.
DIY Solutions for Removing Car Tint
If you prefer DIY approaches or don’t have access to specialized tools or products, you can remove car tint with a couple of DIY solutions. These methods involve using everyday household items. However, please note that they may be less effective than the previous methods. Here are two DIY solutions to consider:
Option 1: Ammonia and Trash Bag Method
Gather the following materials:
- Ammonia
- Trash bags (black or dark-colored)
- Masking tape
- Razor blade or utility knife
- Spray bottle filled with soapy water
- Microfiber cloth
- Create a barrier around the window by taping the trash bags to the window’s exterior. This will prevent ammonia fumes from entering the vehicle.
- Spray the ammonia directly onto the tint film, ensuring thorough coverage.
- Cover the sprayed area with another layer of trash bag, taping it in place to create a seal. This helps trap the ammonia fumes and speeds up the tint removal process.
- Leave the car in direct sunlight or a warm area for about one to two hours, allowing the ammonia and heat to soften the tint film.
- After the designated time, carefully remove the trash bags and peel off the tint film using a razor blade or utility knife.
- Clean the window using soapy water and a microfiber cloth, and dry it thoroughly.
Option 2: Vinegar and Soap Solution
Gather the following materials:
- White vinegar
- Dish soap
- Spray bottle filled with warm water
- Razor blade or utility knife
- Microfiber cloth

- Mix equal parts vinegar and warm water in a spray bottle. Add a few drops of dish soap and shake the bottle to create a vinegar and soap solution.
- Spray the solution onto the tint film, ensuring thorough coverage.
- Let the solution sit on the film for approximately 15 to 20 minutes to soften the adhesive.
- Gently peel off the tint film using a razor blade or utility knife.
- Clean the window using warm water and dish soap, and dry it with a microfiber cloth.
Professional Car Tint Removal Services
If you prefer to leave car tint removal to the experts or find the process too challenging, you can always seek professional services. Professional technicians have the expertise and specialized tools to remove tint efficiently and without any risk of damage to your car’s windows.
Research local service providers, read reviews, and compare prices to find a reputable professional.
Safety Precautions and Tips for Successful Tint Removal
When removing car tint, it’s crucial to prioritize safety and follow certain precautions to avoid accidents or damage to your vehicle. Here are some safety tips to keep in mind:
- Always work in a well-ventilated area.
- Use protective goggles and gloves to shield yourself from chemicals and debris.
- Be cautious when working with sharp tools like razor blades or utility knives.
- Follow the instructions provided with any chemicals or cleaning solutions.
- Take breaks as needed to prevent fatigue.
Conclusion
Removing car tint can be a rewarding but meticulous process. Whether you choose the DIY route or opt for professional services, the key is approaching the task with patience, caution, and the right tools.
Now that you know how to remove car tint like a pro, it’s time to start. Gather your tools, choose your preferred method, and transform your car’s windows back to their original clarity. Enjoy the benefits of a clean, fresh look and improved visibility on your drives.
Frequently Asked Questions
Can I remove the car tint myself?
Yes, you can remove car tint yourself using various DIY methods. However, it requires patience, careful execution, and the right tools. Nevertheless, if you’re confident in your abilities, you can save money by opting for the DIY approach.
Will tint removal damage my car windows?
When performed correctly, tint removal should not damage your car windows. However, following proper techniques and using the right tools are crucial to avoid scratches or other damage. If you’re unsure or concerned, seeking professional assistance is a safe option.
How long does it take to remove car tint?
The time required to remove car tint can vary depending on factors such as the size of the windows, the adhesive strength, and the method chosen. On average, the process can take a few hours to a full day.
Can I reuse the tint after removal?
In most cases, reusing the tint after removal is not recommended. The adhesive may lose effectiveness, and the tint may have degraded or damaged during removal. Investing in new, high-quality tint for a clean and professional result is best.
Is it necessary to remove all the adhesive residue after removing the tint?
While it’s ideal to remove as much adhesive residue as possible for a clean finish, minor traces of adhesive can be removed using a window cleaner or adhesive remover.